Happy Birthday America! Let’s get in the spirit and decorate those nails. Whether you go to a nail salon for a professional manicure or want to to try something festive at home, we’ve got plenty of patriotic nail inspiration for everyone. Stick with us and you’ll be ready to rock the neighborhood block party, weekend at the lake, or backyard BBQ.
Start by looking through our inspiration ideas, next move on to our suggested tools, and finish with our frequently asked questions for last minute manicure tips and tricks.
Independence Day Nail Inspiration Ideas
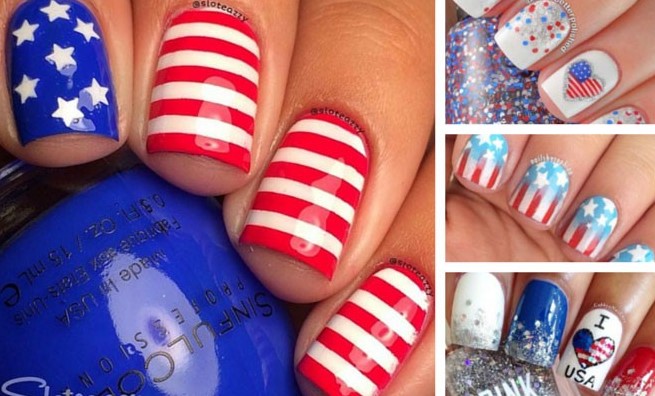
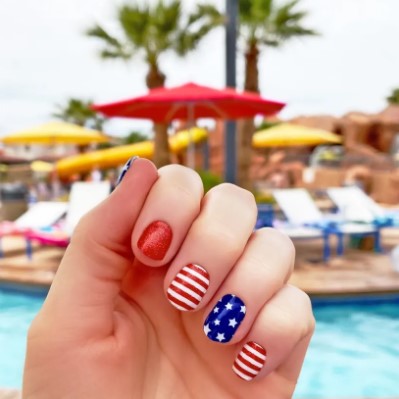
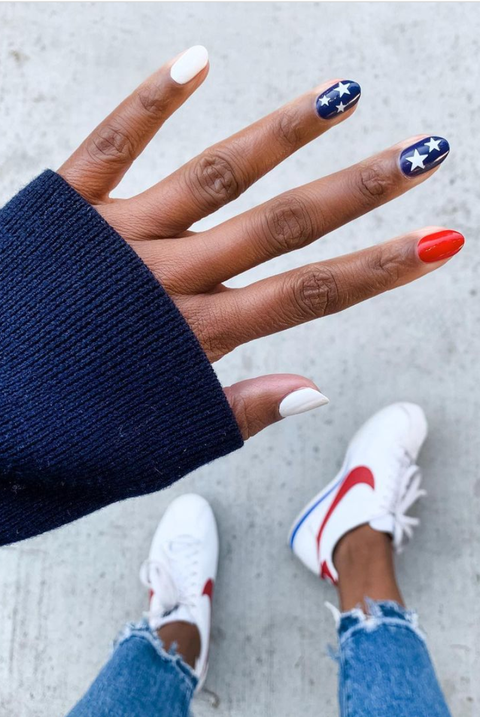
Alternating Blue and Red Nails
This is a super easy manicure to do at home. Start with a red, white, and blue pattern starting at your thumb and moving toward your pinky. Consider adding in a touch of glitter polish or metallic polish on only a few nails as a fun accent. You can really play with this one and make it suit your style. The best part is you don’t need any special tools or special training to pull this one off. Instagram/@xoheavensent
Polka Dots Nails
Polka dots are a fun and whimsical nail idea for the 4th of July. You can achieve a festive look by combining two to three of your favorite patriotic shades. If you want to go extra sparkly or glam? This is the perfect holiday to add in a metallic silver or gold. Full on glitter in a red, white, blue, silver or gold is also a fun choice. Use a dotter tool or toothpick to create your dots. Go with big bold dots like @hiitsvicky or small dainty dots like @basecoatnailsalon.
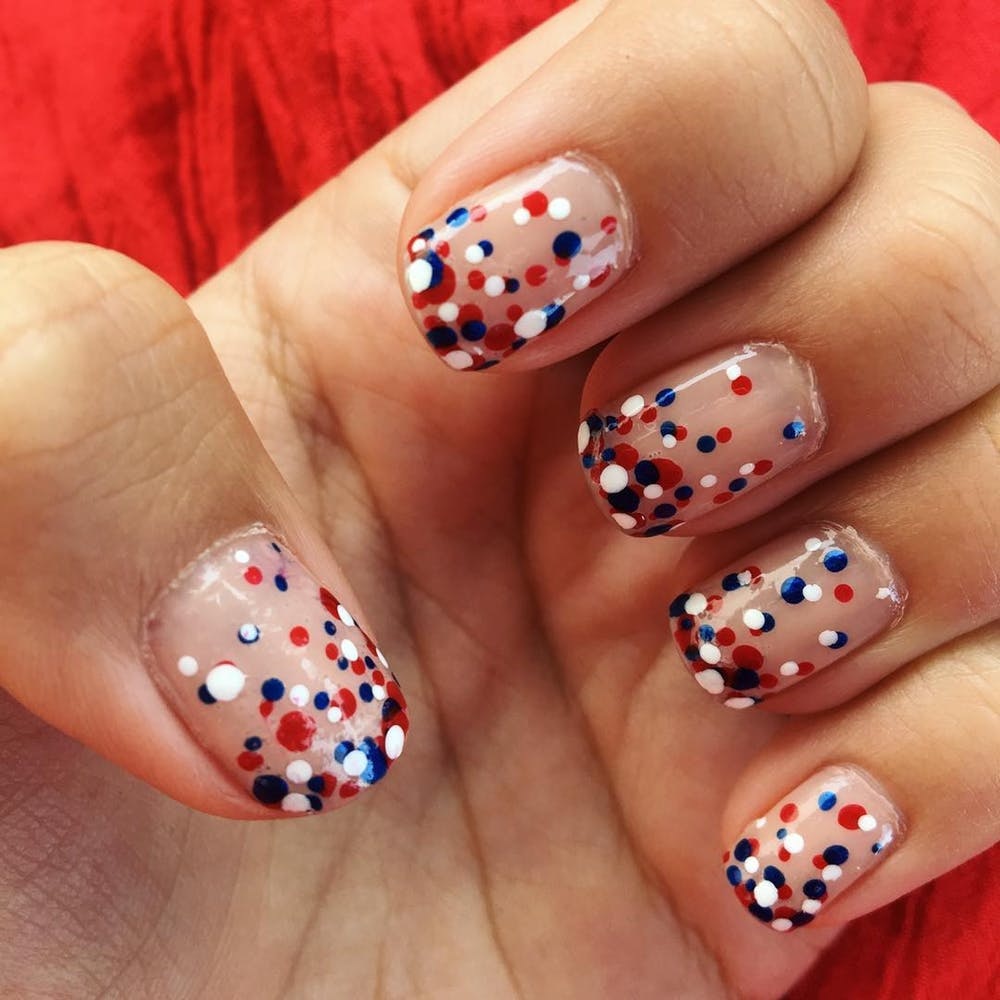
Instagram/@hiitsvicky
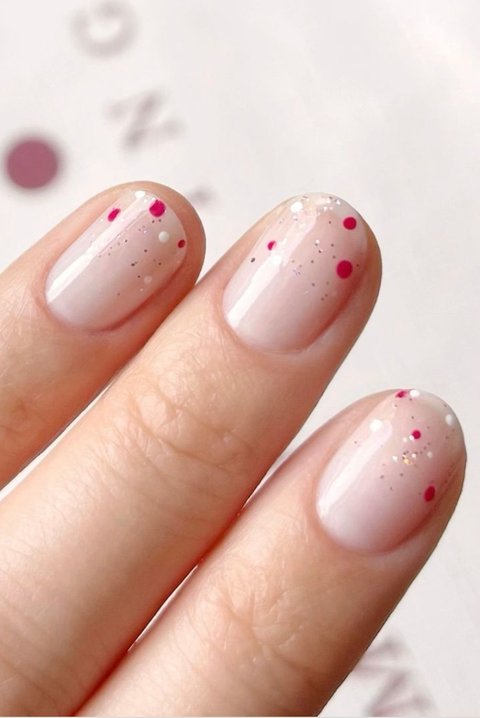
Instagram/@basecoatnailsalon
Nail Wraps or Strips
Nail wraps and nail strips hare a convenient alternative to the traditional manicure. We love this option because you can get intricate designs and patterns that are hard to complete without training. These are a good option if you want something more than a nail decal. It can take less than hour to apply a set of nail strips too. Plus there is absolutely no dry time-so the convenience in unmatched. We love Dashing Diva nail strips in Gloss and Glaze.
Stars Nails
What’s more patriotic than a fun set of star shaped manicure stickers or nail designs? Grab a set and add them as desired to your manicure and pedicure. Add one or more to each nail or use the stars as a fun accent on only one or two nails per hand. Stickers are much easier than trying to paint stars with polish. Pro-tip: be sure to add a top coat to seal the sticker to your base nail color. If you plan to paint your own stars use a small brush or toothpick. Remember our motto “slow is pro!”
Instagram/@themaniclub
Neutral Nails
Don’t want a bright red, white, and blue mani this year? Go for a soft neutral that packs just as much patriotic punch. For this one you’ll need a neutral base, a small star decal or sticker, and an optional dot of red, white or blue polish. Be sure to add a glossy top coat to make this one shine. Pro-tip; If you don’t have a tiny brush use a toothpick tip to make this super small accent dot.

Instagram/@color_camp
Americana Tie Dye Nails
This one requires a steady hand, but the payoff is big. You’ll need three polishes in red, white, and blue. We recommend solid shades, but you can try a glitter if desired. Gently add your three colors being careful to clean your nail brush tip each time to avoid mixing colors in your polish bottles. Next, use a toothpick to gently swirl or pull the colors into one another for a fun tie dye effect. You’re sure to be the only one at the neighborhood BBQ with this unique manicure.
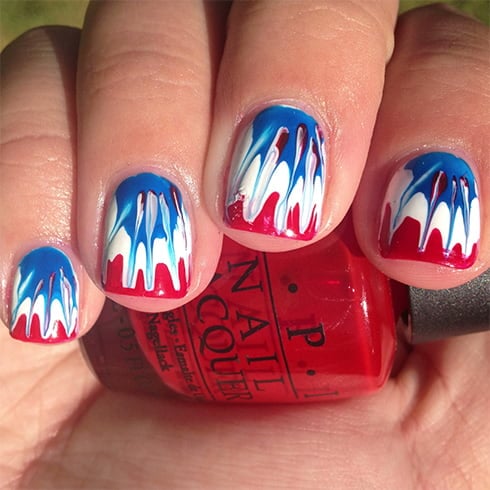
polishmeplease.wordpress.com
Modern Stripes
This one is a fun take an old favorite. Start with a solid nail primer or base coat. Next, add a stipe of red white or blue on each nail. The goal is for your naturl nail to shine through, so be sure your strips don’t completely cover your nail. Pro-tip: add one color at a time and allow to dry completely. Use tape to get extra crisp lines. Finish with a glossy or matte top coat.
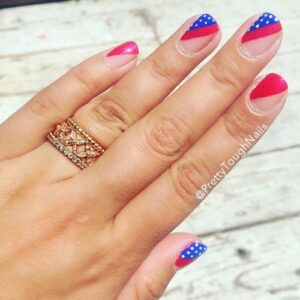
Instagram/@prettytoughnails
Festive Firework Nails
This one is not for the faint of heart, but is easier than it looks. You’ll need a tiny brush, toothpick, or nail dotter tool. Start with a base coat of white polish. Add small stokes in your chosen shades to create fireworks. Pro-tip: add one color at at time to avoid colors running together on your nails or blending in your bottle. Add a touch of metallic for extra depth.
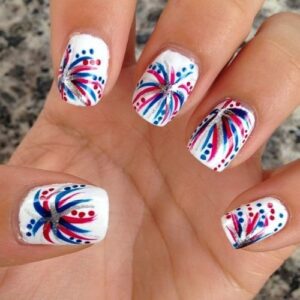
Instagram/@top6trends
We all Scream for Ice Cream
Wow this is one impressive mixed manicure1 You’ll need polish in red, white, blue. and brown. Other supplies will be tape to make those stripes extra crisp, a dotter tool or toothpick for polka dots and your cherry. Start by painting your nails white. Add stripes to 4 nails. On your ring finger create an ice cream cone on the tip and add extra white for the ice cream scoop. Next add your ice cream details and drippy blue accents. Be sure to finish with a glossy top coat. Pro-tip: allow each step to dry completely before adding more polish. Otherwise your manicure will take ages to dry. If you’re looking for something minimal consider solid color nails with one fun accent ice cream cone nail in patriotic red, white and blue.
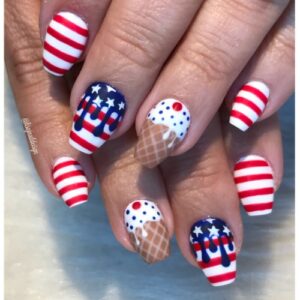
Instagram/@lisajnaildesign
Suggested Tools and Supplies
If you plan to give yourself an at home manicure there are a few items you will want to have on hand (no pun intended!). Grab your tools and supplies before you start your manicure.
Nail File
A nail file is very helpful to achieve the perfect at home manicure. Choose a style that works best for you such as a glass or metal file or an emery board. We prefer a glass file because it is gentle on nails and works well to prep nails before polish and smooth imperfections without chipping polish at the end of your manicure process. Pro-tip: whichever type of file you select, be sure to file your nails moving in one direction. Moving your chosen file back and forth in both directions can cause your nails to tear, break, or split.
Nail Clippers
A good set of nail clippers will take you a long way. Nail clipper are essential if you plan to use adhesive nail polish strips. Trim any unnecessary length from your nails before you add your nail polish primer.
Nail Polish Remover
Nail polish remover is an essential tool in your at home manicure set. You can use either acetone or non-acetone remover. We recommend non-acetone because it is gentler on nails and less drying. However, if you are using a very dark nail polish color or a glitter polish you may need to use acetone to completely remove the polish. You can choose from bottle versions of remover, remover pads, remover pots, and even remover corrector pens. A corrector pen works great to clean up any mistakes after your manicure is completely dry. Pro-tip: no remover pen? Go with a cotton swab dipped in remover instead.
Cotton Rounds or Swabs
Cotton pads or swabs are not only great for removing makeup at the end of the day, they are also very helpful when removing nail polish. Just add your favorite remover and you’re good to go.
Nail Polish Primer
The number one most important supply you need to preserve and protect the health of your nails is a good nail polish primer or base coat. You will want to look for a formula that is best suited for your nails. Many offer extra hydration, vitamins, or specific benefits for different nail conditions. The primer serves as an extra layer of protection between your nail and the polish you are getting ready to apply. Your primer also helps to prevent discoloration of your nails. No one wants stained nails after a fun red manicure. Pro-tip: allow the base coat to dry completely before adding any color. This will allow your manicure to dry quicker and last longer.
Nail Polish Top Coat
Similar to a base coat to protect your nail, you also want a top coat to protect your polish. Your top coat will provide a nice barrier from everyday wear and tear to prevent peeling and chipping. This is essential in the summer when your hands may encounter sunscreen, lotions, and water more frequently than in the winter. A top coat is also great if you type on a computer all day as well. Top coats come in both glossy and matte finishes.
Frequently Asked Questions
Should I use a nail polish base coat? Yes! A nail polish primer or base coat will protect your nail from the damages a manicure or nail polish may cause. For example, staining from dark colored polish. A base coat generally has lots of healthy vitamins to help keep your nails strong and happy.
Do I need fancy tools for an at home manicure? No! You can create a salon-worthy manicure at home without any expensive tools. Consider using nail polish wraps or strips for intricate details. You can also use common household items such as toothpicks, pencil eraser tips, and tape to help create the manicure of your dreams.
What nail designs are trending now? French tips, classic red, marble, foil and smiley faces are trending now. Create a patriotic manicure in marble or with fun smileys to combine a trend with the 4th of July.
What nail colors are popular? This season is all about bold bright colors. Think bright neon colors, orangey reds, mint, teal and rainbow shades.