Are you ready to add some fun and festive DIY pieces to your Halloween décor this year? Well, this easy and fun Halloween Village project is perfect. Even if you aren’t feeling creative or you aren’t an experienced crafter, this project is for you. In fact, it’s for everyone! Kids, teens, and adults will all enjoy making this fun little village.
Seriously, it is so easy and there really is no way to mess this one up. The whole process can be done in an afternoon or over several evenings. This project is completely flexible to fit into your schedule.
Getting Started
Since crafting with kids can be different, we created two guides below. The first for kids and the second for everyone else. Use one or both and have some fun!
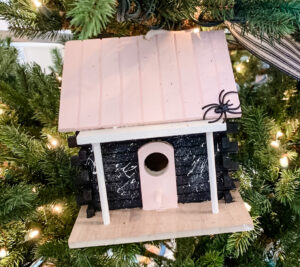
If you plan to add your village to a Halloween Tree or you want to create your own Halloween Village Tree check out our complete tutorial HERE. Making the houses into a festive village is a fun and unique way to display your one-of-a-kind pieces.
But where do you begin? If you have kids who want to pitch in on the decorating we recommend you start with our Kids Guide. It’s the first section below. If you’re an adult or have older kids we recommend the Teens and Grown-Ups Guide.
Now, let’s get to creating!
Halloween Village Guide- Kids
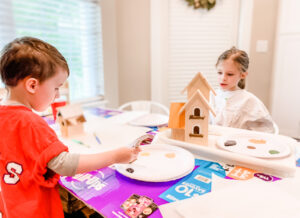
Making a fun Halloween Village with your little ones has never been easier or more fun. You can make this project as simple or elaborate as you like. It is easily adaptable to suit the needs of your family. Complete the project in one afternoon or work on it in small doses for as many days as needed. No matter how you do it, this activity is guaranteed to bring the spooky or cutesy Halloween fun! When it’s finished, you’ll have a great piece or a few pieces of new Halloween décor to display!

Gather your supplies
-
-
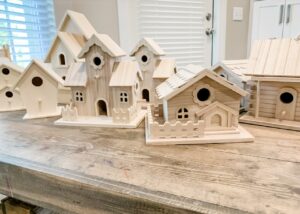
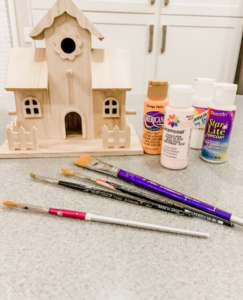
- Unfinished wooden birdhouses
- Washable paint or craft paint
- Paintbrushes
- Craft glue
- Old box or newspaper
- Paint shirts
- Paper plates or plastic cups
- Paper towels or dish towels
- Optional accessories: beads, glitter, feathers, ribbon, etc.
-
Prepare the space
-
-
- Cover your surface with old newspapers or an old cardboard box. If necessary, cover the floor too.
- Remove stickers from birdhouses.
-
Get the kids ready
-
-
- Have children wear paint shirts or old clothes.
- Give each child a paper plate with a small amount of paint in each color.
- Hand out paintbrushes.
-
Paint!
-
-
- Put on a fun kid’s Halloween playlist to get in the spirit.
-
Let the items dry
-
-
- Pro-tip, move the houses to an area where they cannot be reached by little hands. Keep them up high until they are completely dry.
-
Clean up
-
-
- Wash out all paintbrushes and put away the paint. Allow paint brushes to air dry lying flat on a dish towel or paper towel.
- Clean up the work surface and carefully remove any items with wet paint.
- Change the kids out of paint clothes and wash them separately from other laundry.
- Check the entire area for any paint splatters or spills.
-
Add accessories
-
-
- This can be done as soon as the paint is dry or you can wait until a different day. We waited until the next day.
- Using craft glue or hot glue (adult assistance is required with a hot glue gun), add beads, ribbon, feathers, glitter, stickers, sequins, string, cheesecloth, etc.
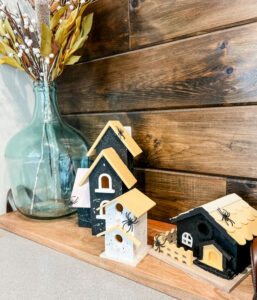
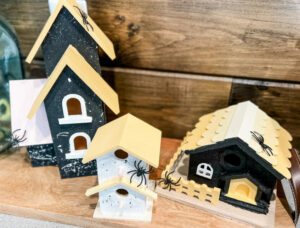
- We cut the ring piece off of some plastic spider rings and hot glued them to cheesecloth. Super easy and super spooky! (Except now I keep finding the extra rings in my house and having small heart attacks all day).
- Let your child’s creativity run wild!
-
Display those adorable houses!
-
- Display the houses on a bookshelf, kitchen counter, mantle, or entryway table.
- If you want to create a Halloween Village Tree we have a complete tutorial HERE.

Halloween Village Guide- Teens and Grown-Ups
Who says the kids get to have all the fun? Everyone else can join in on the fun too. This tutorial will help you go from a rough idea to a finished village in no time. Follow our easy steps to plan and execute a scary or sweet Halloween Village.
Choose a color scheme or theme
-
-
- Do you want your houses to be spooky and dark or bright and cheerful? Perhaps you want them to be soft and sweet so you can choose a pastel color scheme? Or maybe you have a more minimal black, white, and unfinished wood plan in mind? Whichever look you’re going for, be certain that you have a clear vision and stick to it.
- Choose your paint colors and accessories accordingly.
- The more coordinated and well-thought-out your look is, the better your overall village will look in the end.
-
Gather your supplies
-
-
- Unfinished wooden birdhouses
- Craft paint (we like acrylic)
- Paintbrushes
- Craft glue or hot glue
- Old box or newspaper
- Paint shirt
- Paper plates or plastic cups
- Paper towels or dish towels
- Optional accessories: glitter, glitter paint topcoat, ribbon, tiny pumpkins, unfinished wood notions, tiny bottle brush trees, etc. I got the plastic spiders and skeletons shown here in the Target dollar section.
-
Prepare the space
-
-
- Cover your surface with old newspapers or an old cardboard box. If necessary, cover the floor too.
-
Prepare the birdhouses
-
-
- Remove stickers from birdhouses.
- If you want your colors to be bright and vibrant, add a thin coat of white paint to each house. This will allow your colors to appear more true to tone as you see in the paint bottle. Similar to painting a wall in your home, going over the wood grain will take more coats without a nice primer of white. This will save you a bit of time and paint in the long run, especially if you plan to use lighter colors.
-
Make a painting plan
-
-
- In step 1, you chose a theme and some colors for this village. Now you need to take that one step further.
- Make a plan for what color(s) you want to paint each house. Will they all be the same color with different accents? Which colors will pair together?
- Nothing is set in stone and you can always repaint, but having a general idea is good before diving right in.
- We recommend coming up with an overall set of colors and then dividing and using the colors in three different combinations. For example, if you’re using light pink, orange, white, and black we did. Consider pairing orange, white, and pink; orange, black, and pink; and pink, white, and black. The repetition of the colors and pairing them in different combos will keep things coordinated but never boring.
-
Prepare your paint
-
-
- Get your paper plate or paint surface ready with the selected colors for your first house.
- Have a damp dish towel or paper towels on hand for any spills etc.
-
Paint!
-
-
- Grab your houses and get started.
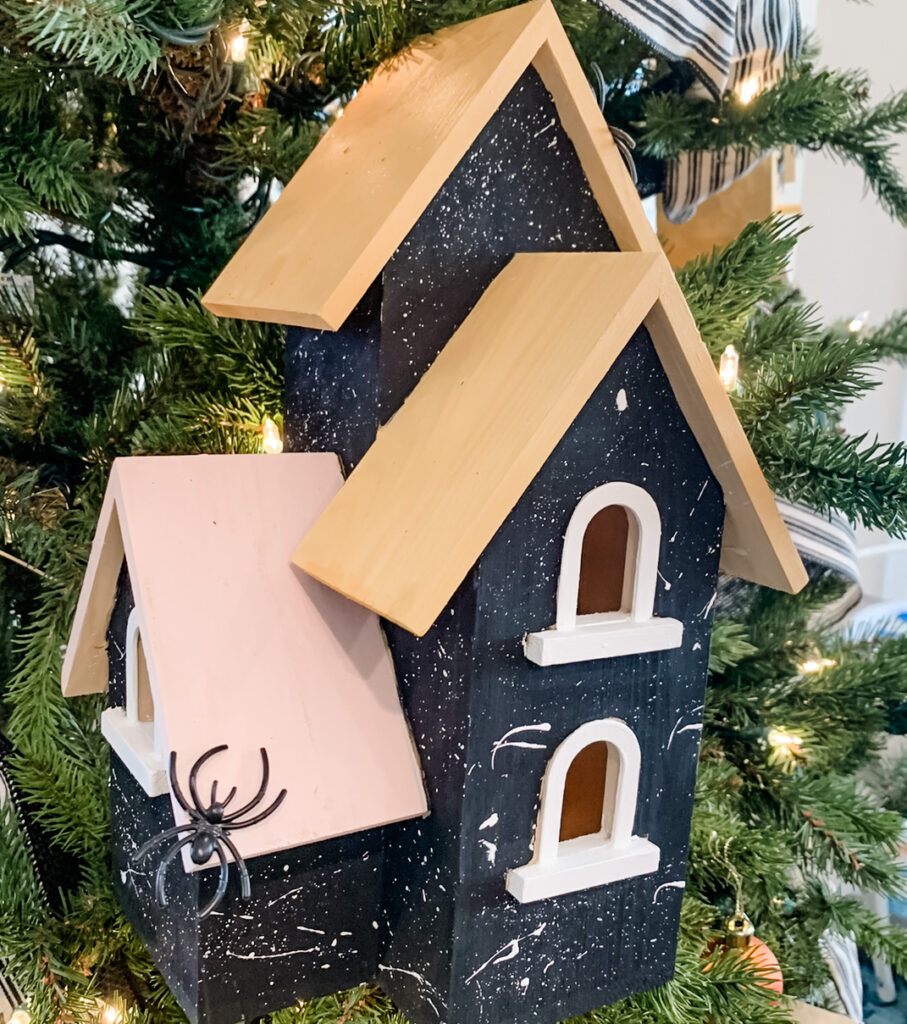
- Consider mixing custom colors for a fun ombre effect. We used orange and white here to create four unique shades used throughout a few of our houses.
- We also experimented with paint splattering for a cheerful, but a little bit messy vibe. Pro-tip, give yourself plenty of room so you won’t splatter other houses or household items behind your house. Also, practice with a few brushes on a scrap piece of paper to get the exact splatters you like. Some brushes give off more globs while others are more wispy dots. It all depends on the overall look you want to achieve, but practicing ensures you won’t be repainting your house’s base coat.
- Pro-tip, don’t forget to paint under the overhang of the roofs or the bottoms of the houses if you plan to hang them from a Halloween Tree. You can certainly leave them unfinished if that is part of the look you want to achieve.
- Pro-tip, brush the paint in one direction. For example up and down or across. Not both. Your paint could streak and look messy unless that is the look you are trying to achieve.
- Pro-tip, work in thin even coats. It’s always easier to add more paint than it is to remove too much.
-
Let the houses dry
-
-
- Make sure you give your paint plenty of time to dry between coats and before adding accessories.
-
Clean up
-
-
- Wash out all paintbrushes and put away the paint. Allow paint brushes to air dry lying flat on a dish towel or paper towel.
- Clean up the work surface and carefully remove any items with wet paint.
- Check the entire area for any paint splatters or spills.
- Wash paint clothes separately from other laundry.
-
Add decorations
-
-
- Wait until the paint is completely dry.
- Add accessories using craft glue or hot glue. (I used plastic spider rings and skeletons from the Target dollar section! I cut off the ring and attached the spiders with hot glue). It was super easy and gave them that little something extra.
- Pro-tip, for heavier pieces like large beads etc., lay the house down and let gravity assist you. This way you aren’t sitting and holding accessories for hours on end as you wait for them to dry.
- Add a top coat during this step, if desired, in a glittery or shimmery finish.
-
Display the houses!
-
- Display the houses on a bookshelf, kitchen counter, mantle, or entryway table.
- Remember you can really get into the Halloween spirit by adding these festive houses to an artificial Christmas tree. If you want to create a Halloween Village Tree we have a complete tutorial HERE.
Frequently Asked Questions
What type of paint is best for a Halloween Village?
We recommend using acrylic paints. Acrylic paints work well on unfinished wood and will last a long time. Using acrylic paints will also mean using less paint overall when compared to washable paints. Acrylic paints will not soak into the wood as much causing you to paint multiple coats.
How long do I need to wait to add accessories to my Halloween Houses?
We recommend at least one house for your house to completely dry. However, if you did a thick technique on your house such as polka dots or used thick paints such as decorative puffy paint, we recommend waiting 12-24 hours. It is always better safe than sorry and no one wants to repaint their house.
Where is the best place to buy unfinished wooden houses?
Our favorite places to find lightweight unfinished houses are local craft stores (look near the decorative wooden pieces such as boxes or letters), big box stores with craft areas, online retailers such as Amazon, and your local home improvement store.
How many unfinished houses will I need if I want to create a Halloween Village Tree?
This all depends on the height and style of your tree. A 6-foot-tall pencil-shaped tree will require fewer houses than a 9-foot full-width tree. For complete information see our Halloween House Guide. Inside the Guide, we offer decorating tips and options for sizes and numbers of houses for the most popular tree heights.