If you’re jumping on the Halloween Tree bandwagon, welcome aboard! I have been wanting to do this for a year or two, but never got around to it. Cue 2020 etc., etc. and here we are!
A Halloween tree, or a tree for any holiday other than Christmas, is a great way to get more use out of your artificial tree and more bang for your buck. It’s also nice to already have the tree up if you’re an early decorator like me. We don’t host Thanksgiving, so I spend a good portion of the first two weeks of November decorating for Christmas. This is my own form of holiday self-care!
By Thanksgiving, my trees are fluffed and decorated. The lawn comes after Thanksgiving (I can exercise a small amount of restraint here). However, the inside is a winter wonderland.
Where to Begin
Ok, back to Halloween. To create a fun and funky, cheerful, or spooky and scary Halloween Village Tree you only need a little creativity and a few hours of time.
Before you get started decorating your tree, you need to do two things:
Start by selecting your tree. If you have more than one artificial tree or you’re looking to buy a second tree this can be quite the choice. Maybe, you want to use a full-size tree and place it in the main living space. Perhaps you want to use a slim style or smaller tree and place it in an entryway, kitchen, playroom, or on top of a table. Do you have a unique tree? Trees in unique colors or finishes are great options as well. The choice is yours.
Whichever tree you choose, be sure to consult our Halloween House Guide below. You want to be sure you have enough houses to fill the tree. Keep in mind, you can always add more houses, but this will give you a general idea based on your tree height and style.
Next, create your village. Here is where you can find our complete tutorial on How to Make a Halloween Village with options for kids and adults. Start there and come back here once your houses are finished.
Congratulations, you finished your houses! Now you can start decorating your tree.
Time to Start Decorating
Gather your supplies
-
-
- Zip ties or pipe cleaners
- Screw hooks or small command hooks
- Ribbon
- Ornaments
- Lights
- Garland
- Tree Topper
- Tree skirt, collar, or basket
- Any other decorations you want to add to the tree
- Your tree
-
Set-up Your Tree
-
-
- First, assemble and fluff your tree.
- If it is pre-lit, check and make sure all of the lights are working.
-
Add Lights
-
-
- Next, add lights to your tree. Even if your tree is pre-lit you can add a few strings of orange or purple lights for a festive touch. Lights in unique shapes like pumpkins or ghosts are fun too.
- This step is completely optional. It all depends on your personal preference. I’m a big fan of lights. For our house, it’s the more the merrier.
-
Attach the Houses
-
-
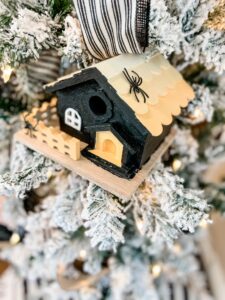
- Next, add your Halloween houses.
- Smaller lightweight houses can be secured with command hooks and pipe cleaners.
- Heavier houses will require a screw hook and a zip tie or two.
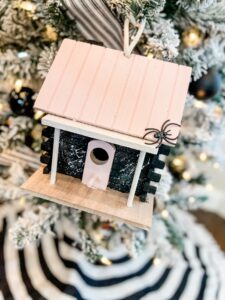
- For this process, you will want to start by attaching the command hook or screw to the back of the house where it will not be seen.
- Next, wrap the pipe cleaner or zip tie around the hook. Secure the other end around a sturdy branch of the tree. Use an interior or supporting branch as opposed to a weaker branch near the edge.
- Pro-tip, if the house is heavier make sure it can sit and rest on a study branch below for extra support.
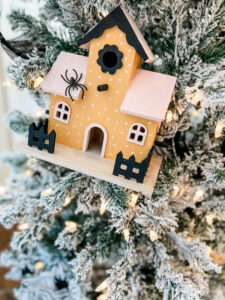
- Finally, you can hang those houses that come with attached hangers or ropes already. Feel free to use those hangers, but make sure the piece is secure in case it gets bumped by pets or children. No one wants a broken house.
-
Ribbon and Garland
-
-
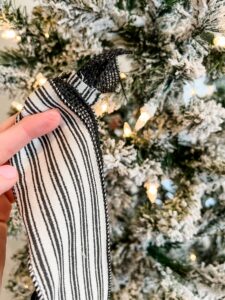
- Add fun ribbons and garlands to match your color scheme.
- Remember to layer the pieces around the houses. (There’s nothing wrong with adding your garland or ribbon first and then adding your houses. Totally up to you!)
- Pro-tip, create loops by twisting and inserting the ribbon between branches for a fuller effect. We have a complete tutorial on How to Hang Ribbon if you want to check it out.
-
Ornaments
-
-
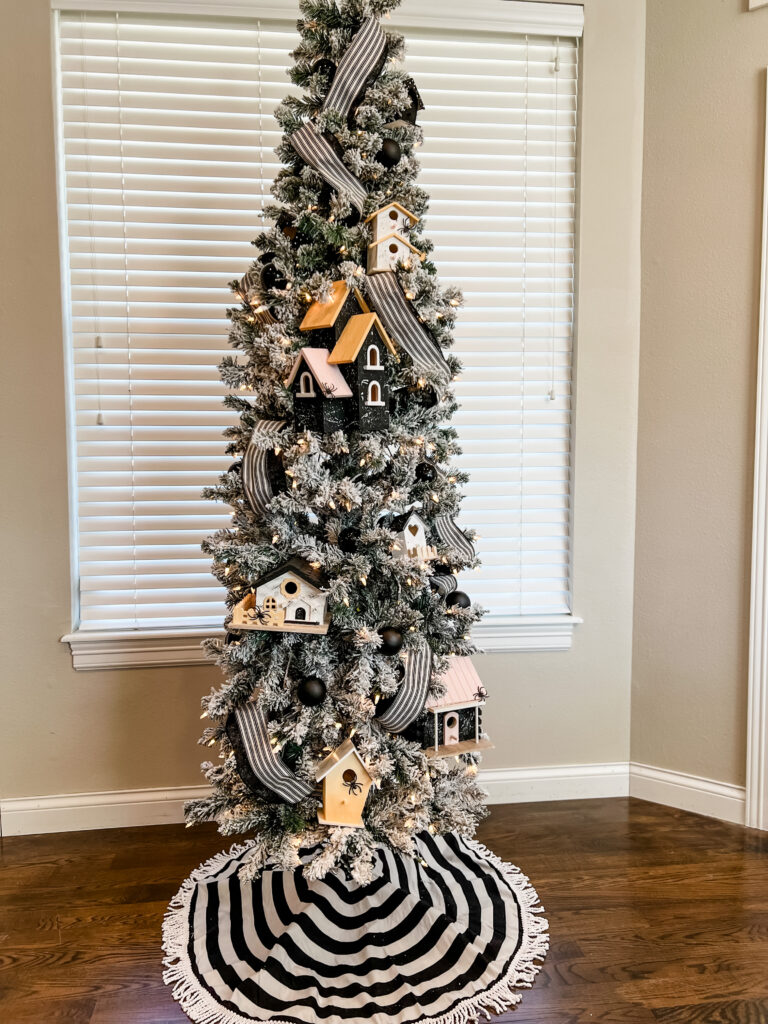
- Next, add ornaments if you have space. Ornaments add dimension and will be great at reflecting the tree’s lights. We used 12 regular-size ball ornaments in black. Six are shiny black and six are matte black. We chose black to match our ribbon and stand out against the white flocked branches.
- If you’re unsure of how many ornaments you need for your tree see How To Find the Perfect Number of Ornaments for Your Christmas Tree. The concept is the same for a Halloween tree.
-
Add Something to the Base
-
-
- Finish your tree with a festive tree skirt, collar, or basket. Re-use your tree collar or basket from Christmas. This is a great way to get more use of this item and get more bang for your buck.
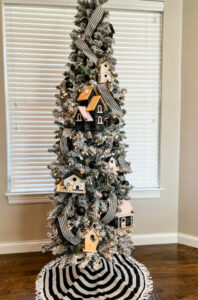
- We added a black and white tree skirt from Amazon for an extra spooky touch.
-
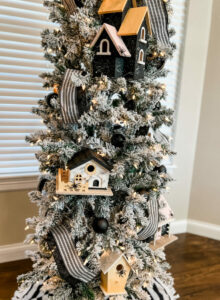
Enjoy your new Halloween Village Tree!
Halloween House Guide
Are you wondering how many houses you will need for your tree? When planning your Halloween Village Tree there is no need to be too stressed. It doesn’t have to be an exact number to be fun and festive. However, you may find the following tips helpful when deciding how many houses you will need for your particular tree.
4 Foot Tree
(8-10 total houses)
A great place to start with a fun and unique tree design is with a smaller tree. This will give you a chance to see what works and what doesn’t before possibly using a larger tree in the coming years. Using a smaller tree will also give you a chance to build up your supply of decorations if you’re on a budget.
For a 4-foot tree, we recommend using mostly small decorative houses. These are lightweight and will be easily supported by the tree’s smaller branches. You can find a good selection at your local craft store or online. If you’re buying online look for something that is lightweight. A good number to start with for small houses is 7.
Next, we recommend 2-3 medium-sized houses. These will need to be secured close to the main support of the tree. Look for houses that are 10 -12 inches in height, but have a thinner structure. Heavy and durable outdoor birdhouses will not work on this size tree. Use craft-only pieces you can find at your local craft store as opposed to home improvement stores.
Overall, you will want about 8-10 houses for a 4-foot tree.
5 Foot Slim/Pencil Tree
(8-14 total houses)
For your slim or pencil tree 5 feet high, you will want anywhere from 8-14 Halloween houses. A 5-foot tree will have a sturdy base and branches that can hold both small and medium-sized Halloween Houses.
Start with 6-8 small houses from your local craft store or online retailer. These are around 3-6 inches in height and very lightweight. Next, look for a few medium-sized houses to mix in. Medium size houses are generally taller at 6-10 inches. We recommend 3-5 in this size.
An optional larger-size house can be used if your tree is extra sturdy. Make sure to look at the branches and see if they can support from underneath while you attach them to the main center support pole. We recommend 2-3 larger houses. Remember, to keep in mind that these should be lightweight. Avoid commercial tree houses found at your local home improvement store and go with more craft options that are lighter in weight.
5 Foot Full-Size Tree
(9-15 total houses)
A full-size/full-width tree gives you tons of space for many festive Halloween houses. You can do a mix of all sizes or stick with larger sizes only. It all depends on what you like best, and if you think your tree can support many medium or larger size houses. The last thing anyone wants is to damage their tree.
We recommend 15 small houses only for a uniform and chic look. If you want a variety go with 8 small houses, 3-4 medium houses, and 2 large houses. Looking to make a major impact? Use only medium and large houses and pair them with florals or plain ornaments.
Things to remember are of course the weight of the houses in relation to your tree’s branches and the overall look you are trying to achieve. The good news is you can’t go wrong!
7-Foot Slim/Pencil
(10-18 total houses)
A 7-foot tree is an excellent candidate for your Halloween Village. This size tree will have the height to really command some attention and show off your creations. Whether your houses are spooky or sweet a 7-foot tree has just the right amount of space to let them shine.
You can decorate your 7-foot tree in a few ways. We like the idea of using a mix of different size houses. Start with 10 small houses, 3-5 medium houses, and finish with 2-4 large houses. If you want your houses to look more like ornaments go with all one size. For example, you can use 18 small houses or 10 medium houses. The choice is yours. You know what will work best with your style and for your specific tree.
Don’t forget to keep the weight of the houses in mind. You want them to be able to hang or be supported with zip ties easily. If the houses are too heavy, you can damage your tree. Pro-tip- look for birdhouses at craft stores in your area. Real professional birdhouses will likely be too heavy to be supported by your tree.
7 Foot Full-Size Tree or Larger
(18-28 houses)
If your tree is 7 feet tall or taller then you are going to have one Halloween showstopper on your hands. What a great amount of space to decorate. Start first by determining the strength of your tree’s branches. Can they hold any of the larger size houses you can find? How difficult will they be to attach?
Also, consider the finish of your tree. Trees with flocking will already be placing extra weight on their branches and the houses will add more. Houses may also damage the flocking if they are too heavy. Keep all of this in mind when sourcing your houses.
Next, decide what type of look and feel you want to achieve with your tree. Using all one-size houses will give a uniform almost ornament-like appearance. If you use a variety of sizes, your tree can appear more whimsical and unexpected. The good news is you can’t mess this up. Whichever way you go, your tree will look fantastic!
If you want to use all the same size houses we recommend 20-28 small houses, 10-14 medium houses, and 6-10 large houses. A variety of sizes is also a fun option. You can mix things up by using 2/3 the total houses in a small size and the remaining third in a medium or large size.