Easter is a special holiday for those who celebrate. Beyond the religious celebrations there are also unique traditions not connected to religion. One of those is decorating Easter eggs! Decorating Easter eggs is fun for kids and adults of all ages.
There are no set rules for decorating eggs so you can use your favorite art supplies. Some of our family favorites are stencils, stickers, ribbons, paint, glitter, and even melted crayons. However, the most popular way in years past has become egg dye.
Dying eggs can be done quickly and inexpensively with relatively few ingredients. Before you can dye your Easter eggs you need to prepare your eggs. Stay tuned and you’ll have your eggs ready to go in no time.
What Do You Need?
- Raw eggs
- Half cup of boiling water
- Paper towels or newspapers
- A deep bowl for submerging an egg
- Tongs or a slotted spoon
- One teaspoon of white vinegar
- Liquid food color
How to Prep and Dye Easter Eggs
Using Hard Boiled Eggs
Take a pot that can easily contain the eggs you want to boil in a single go. Do not layer eggs on top of each other and fill the pan as this may crack the shells. After filling the pot with enough water, place it over a medium heat flame. Use tongs or a slotted spoon to add the eggs into the pot carefully. Wait for the water to boil, then let the eggs cook for about 10 minutes. While the eggs are cooking, prepare a separate bowl of ice water.
Once the eggs finish cooking, carefully place them in this bowl and let them cool down for about 2 minutes. The eggs should be slightly warm after removing them from the ice water. Check if any eggs have cracks and separate them. Place the eggs in a carton or refrigerate them until you want to use them.
Using Raw Eggs
Take a raw egg, wash it carefully in warm water, and dry it. Use a long, sterilized needle or a very thin metal skewer to make a tiny hole in the top part of the egg. With the flat end of the egg facing downwards, create a giant hole at this end. You need to remove pieces of the shell slowly and carefully until the hole is large enough that the tip of a bulb baster can fit through it.
Take the skewer or needle and stick it into the yolk so that it breaks. Hold the baster near the smaller hole and press the bulb so that air gets pushed into the egg. It will force the egg’s contents to empty through the giant hole on the other end of the egg. Place a bowl to catch the contents since you can use it for cooking later. Once the egg is empty, take the empty shell and rinse it under water to clean it properly, and then let it dry.
When you decorate these empty shells, be careful as they are easily broken.
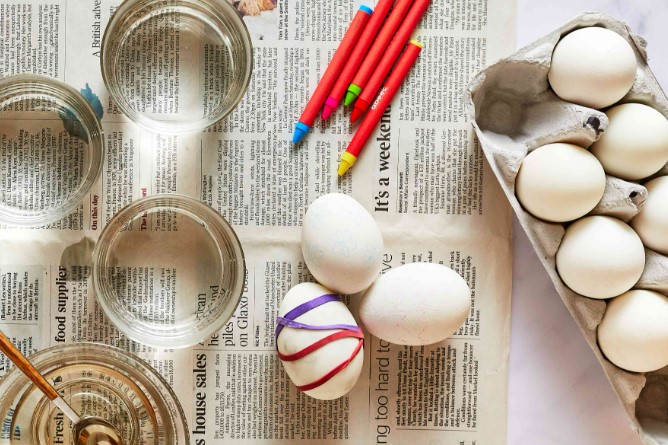
Set Up Your Workspace
You need to set up a dedicated space for this, considering things might get messy while dyeing and decorating the eggs. Cover your tabletop or workspace with a plastic sheet or newspapers and bring a pack of paper towels. You can use a cake cooling rack to place the dyed eggs. Place the dye colors in wide-mouthed jars placed on top of baking sheets. Use your tongs or a slotted spoon when moving the eggs.
Prepare the Dye
You need liquid dyes that are non-toxic and natural, such as vegetable dyes. You can also us Easter egg dye kits. Prepare different colors in separate pots; mix the colors as you like. Take a jar, fill it with one cup of hot water, add white vinegar, and 15 to 20 drops of coloring. Stir the contents of the jar to combine the contents.
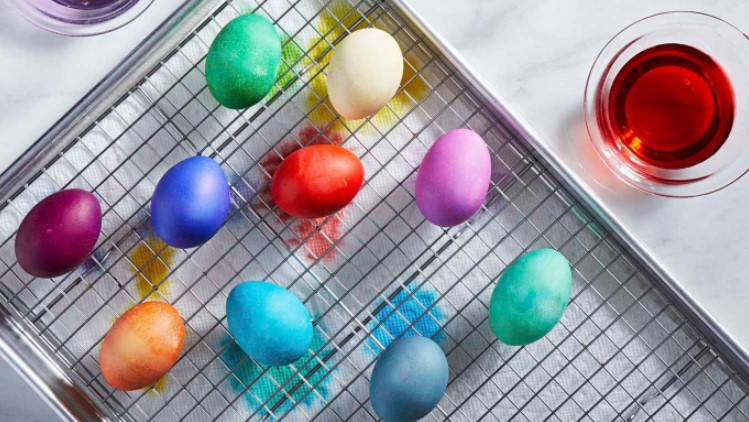
Time to Start Dipping
Take the eggs you prepared earlier and place them in the jars. Let them soak for about 10 to 15 minutes to let the dye attach to the eggshells. If you feel creative and want to make two-toned eggs, then dip only one side of the egg in one color for 10 minutes. Set them aside to dry in a rack or egg holder, ensuring that the colored part faces upwards. Once dried, dye the other half of the egg in a different color.
If you want to add a lacy style look to your egg, you wrap it before dyeing it with a color. Take a lace of your choice and cut it into strips. Wrap it tightly around the egg, securing it in place with a rubber band. Once you are satisfied with its style, you can dip it in hot to warm dye and let it sit for 10 to 15 minutes, and remove it. After the color has dried, take scissors, snip the rubber band, and remove the lace.
Once you are done dyeing, take your tongs and carefully transfer the eggs to the cooling rack so they can dry properly. Refrigerate the eggs until you need to use them.
Get Creative
After the dyeing process, you can add unique designs to them to make them look special. You can use paint embellishments, add funny faces, draw beautiful patterns, use glitter, ribbons, and more. Get your creative juices flowing, and have fun with this project!
Final Thoughts
Easter is a memorable holiday that many enjoy and share with family and friends. Decorating Easter eggs is a fun and creative way to celebrate this holiday. You can start prepping your Easter eggs before dyeing by following the steps above. Invite over the family or your neighborhood crew and let the fun begin!