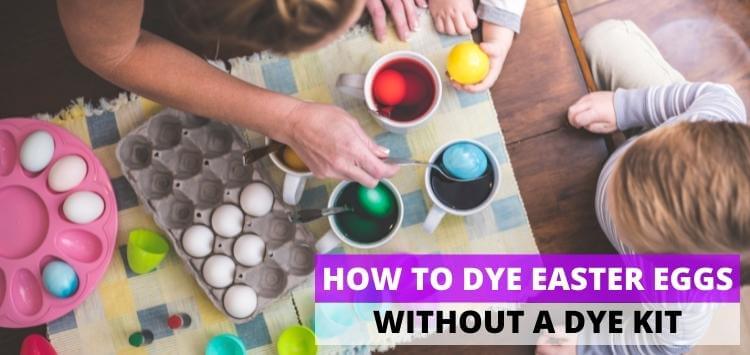
Coloring Easter eggs is a fun and festive tradition enjoyed by children and adults too! Using a standard pre-packaged dye kit is a quick and easy way to participate in this tradition. All you need is eggs and a kit. However, what can you do if you don’t have access to a dye kit? Maybe they are all sold out, or you waited until the last minute. Don’t stress, we’ve got you covered!
Did you know you don’t need a dye kit? That’s right you can create beautiful Easter eggs with items you likely already have in your kitchen. It’s a quick and easy process too.
Stick with us and we’ll show you exactly what to do from the perfect boiled eggs to creating your favorite colors. If you’re looking for other festive ways to decorate your eggs, that don’t include dye, we’ve got some fun alternative options below as well.
Let’s get started!
What Do You Need?
There are some key ingredients you will need to dye eggs. The first thing is hard-boiled eggs – no one wants runny eggs. White vinegar plays an essential part in the dyeing process. If you don’t have white vinegar, you can use lemon juice or lime juice. The acid allows the eggs to retain and achieve vivid colors. This acid treatment prevents your bright and vibrant colors from turning to a pastel shade or fading away quickly.
How to Hard Boil Eggs?
First, place raw eggs in a pot or a saucepan and cover them in cold water, around an inch or two should be good. A quick tip here is to add a teaspoon of vinegar or a pinch of salt. It helps prevent cracking and makes peeling eggs later on much easier.
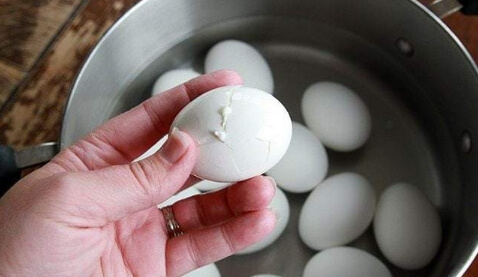
Then bring it to a boil over high or medium-high heat. When the water reaches a boil, cover the pot with a lid and cook for 30 seconds. After that, leave the pot open and set a timer for 10 to 12 minutes.
Another way to do it is constantly cooking over medium-high heat for about 5-6 minutes, depending on the egg size. The latter is much faster, but you can easily overcook the eggs. Finally, carefully move the cooked eggs out of the water and transfer them to an ice bath to stop them from cooking further.
How to Make DIY Natural Food Coloring
You might assume making homemade dyes is difficult, but things are simpler than you’d expect. You can turn various kitchen ingredients into affordable and reliable dyes with the steps below. This version is incredibly safe for your family, since you know every ingredient you’re using and touching.
The steps below can be altered throughout the process, so let’s have some fun experimenting. The only difference is the adjustment of time and the number of materials added to match your preference for the final look of your eggs.
- Step 1:”Pour 4-6 cups of water into a medium sized pot or sauce pan. You’ll be using chopped or mashed vegetables and fruits for each color you want to make. You want enough water to fully submerge your food items, one item at a time.
- Step 2: Add one tablespoon of vinegar for every 2 cups of water.
- Step 3: Bring the pot to a boil and add the dye ingredient color of your choice. Next, turn down the heat to low or simmer and let it sit for 30 minutes, stirring occasionally. You’ll slowly see the color come out and mature.
- Step 4: Let the pot cool and remove any food particles with a strainer.
- Step 5: Add your eggs to the strained dye and let it soak. The longer you soak your eggs, the more they absorb the color. The longer your eggs soak the more vibrant and deeper the colors should be. The time is up to you, but make sure to let the eggs submerge for at least 30 minutes. When the egg color is to your liking, remove the eggs and place them on a drying rack. Pro-tip: make sure your work service is completely covered so you don’t accidently dye any new kitchen towels or countertops. We recommend old newspapers, magazines, or paper towels.
What Colors Can You Create From Items In Your Kitchen?
There are a lot of useful materials in your kitchen you can use to dye your Easter eggs. Here are some of our favorites! Use what you have and remember you can mix items to make new colors too.

Red
If red is what you’re looking for, beetroots are an ideal option to give your eggs a deep red or pinkish hue. Add roughly chopped peeled-off beets into a pot and follow the steps mentioned above.
Another interesting experiment is red or purple cabbage. However, it’s not commonly used because of the inconsistency of color it offers. To fix this issue, remember to add vinegar or lemon juice to the cabbage liquid.
Yellow
Nothing gives a better yellow stain than turmeric. You can get your desired shade of yellow by adding more or less turmeric powder. However, be careful about the amount of turmeric you’re using. Too much turmeric powder can give off a strong odor, which you may or may not enjoy.
Blue
Blueberries can help you get a deep ocean blue. Add 2 or 3 cups of blueberries and follow the instructions above.
An interesting experiment is adding a pinch of baking soda into the red cabbage liquid mentioned above, which creates a darker blue color mixture. Don’t add too much baking soda if you plan to eat your eggs because it will give you a bitter aftertaste.
Green
Chop spinach leaves and then add them into a saucepan. Spinach is one of the most reliable options to get a true green color. Pour in 2 cups of water and 4 tablespoons white vinegar. Bring it to a boil and follow the listed steps above.
Orange
Peel off the skins from 2 to 4 onions and follow the instructions above. For a brighter look, let the eggs sit overnight. Out of all-natural dyes, onion skin gives out the best presentation in the least time.
Carrots is another great option for orange. Using a blender to blend up carrots is very effective. You can choose to strain off the flesh before or after boiling and then use the above steps.
Purple
To have purple dye, you can use a combination of red wine and eggs. Pour red wine into a container, add an egg, and mix it up. Let the eggs submerge until they reach the desired color. Take them out with a spoon and rinse the eggs under cool water, then use paper towels to dry them out.
Another option is red or purple cabbage. However, while boiling the cabbage, you don’t need to add vinegar because the color will change according to the pH level.
If you have any leftover grapes, take advantage of them. Basically, grapes contain a certain amount of juice, so you can add little or no water based on how much grape juice you have on hand. Because some types of grapes don’t have a dark color, adding too much water will dilute the color itself.
Brown
You will need 2 cups of strong brewed coffee mixed with the combination you’ve made before in step 1. You can control the level of lightness by adjusting the amount of water you’re using. If you want your eggs on the darker side, let them soak overnight to absorb more color. Likewise, black tea also gives out an identical result. It perfectly works for those who don’t have or dislike coffee.
The Kool-Aid Method
Kool-Aid may not be natural, but it works well to decorate eggs. Of the dyes here, it seems to be the fastest and the most convenient way when you don’t have any food coloring in the house. Kool-Aid packets are affordable, easy to find, and have vibrant colors.
Mix your Kool-Aid packet with water. Using or more or less than directed on the package. More water here equals a lighter color and less water will give a darker color. Add vinegar as directed above and then add your eggs. The longer the eggs soak, the richer the color will be.
Dye-free techniques
Try these dye-free, creative and unique ideas if you still want to enjoy Easter eggs without messy dyes. You can use a variety of materials, such as markers, sprinkles, decorated paper, tapes, and so on. Feel free to experiment and try new things, you’re only limited by your imagination.
Permanent Marker
Start your beautiful designs by simply using permanent markers on your Easter eggs. This dye-free idea allows you to try on unfamiliar patterns, chic, hand-drawn faces that can not be achieved when it comes to dyed eggs. You can even get more creative and make Emoji Easter eggs.
Sprinkles
Sprinkles can transform regular eggs into an edible masterpiece with minimum effort. These decorated eggs with pastel-colored nonpareils would make your Easter basket stand out from other baskets. All you need is water, sugar – either refined or powdered sugar still works, a Ziplock bag, and last but not least, nonpareils.
First, whisk sugar and water together in a container to form a thick paste, similar to glue’s consistency. Then gently roll the eggs in the paste with a fork or slotted spoon. After that, lift the egg and let the excess sugar drip off before putting the egg into the sprinkles bag. Eventually, shake the bag so that the sprinkles can cover the egg thoroughly. Carefully take the egg out and let it dry. Don’t move the eggs before they’re completely dry; you’ll only end up chipping off the decorations.
Washi Tape Eggs
Washi Tape Eggs is the ultimate no-mess solution for your Easter day. Wrap some colored rolls of Washi tape and start experimenting and creating your artwork. If your tape isn’t sticky enough to stick try using a glue stick to get a little more traction.
Decoupage Eggs
Another fun way where kids can get involved with decorating Easter eggs is using decoupage. This method is a little messier than the Washi tape, but you don’t need to worry about the stains. You’ll need a brush and school glue or mod podge craft sealer. Cover the surface with a thin layer of glue, then place it on whatever you have, whether it’d be a feather, tissue paper, bits of fabric, etc. Cover the whole thing with another coat of glue to seal everything up, and then wait for it to dry.
Stickers
Kids love sticking stickers all over the walls, floor, or wherever they can find. Why don’t we try this on your eggs? It’s a lot of fun. Place any stickers on the egg surface and try to create something aesthetic. Notice small cracks on your egg; those stickers will seal off these areas and make it prettier. If the stickers keep coming off, you can cover them in a thin coat of glue for better adhesion.
Let’s Discover: How to Dye Easter Eggs With Shaving Cream?
Final Thoughts
Even if you don’t have store-bought food dyes, there’s no need to worry. There are many alternatives that you can use for a stress free and fun Easter. Try one of these fun new methods this year!